You can even smell the hairspray through the photo. It's just the cheapo import Jackson since I'm not made of money.
Isn't she purdy? Homemade tiger stripes on my soloist
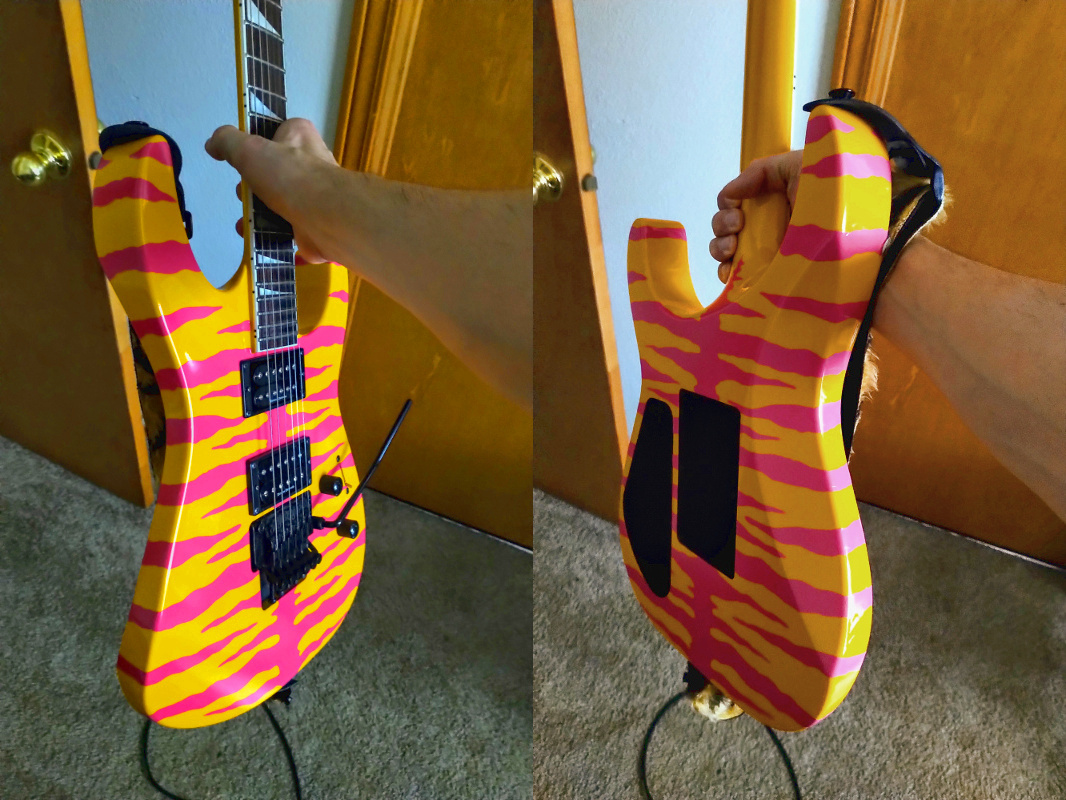
You can even smell the hairspray through the photo. It's just the cheapo import Jackson since I'm not made of money.
12 Comments
CarrierLost@lemmy.one · 7 pts · 3y
The older I get, the more I love the obnoxious colors. 😁
rigatti@lemmy.world · 4 pts · 3y
Purdy is a word for it.
obesity52@lemmy.world · 4 pts · 3y
Yeah it's definitely not for every situation but I'll pull it out when it's needed.
coldhotman@nrsk.no · 4 pts · 3y
hotdogcostanza@lemm.ee · 4 pts · 3y
looks rad as fuck, good job!
baronvonj@lemmy.world · 2 pts · 3y
Looks killer!
obesity52@lemmy.world · 2 pts · 3y
Btw a Cricut or similar can work wonders for this kind of thing if you prefer drawing on a computer. I had it cut out the pattern on an adhesive sheet instead of applying/shaping masking tape by hand. Gets a little wonky on the sides but I think it still turned out pretty well.
tostiloco@lemmy.world · 1 pts · 3y
Great tip!
cherubrocky@waveform.social · 2 pts · 3y
That is one rad axe, no better word for it!
blackstrat@lemmy.fwgx.uk · 1 pts · 3y
Looks awesome. How did you make the stripes?
obesity52@lemmy.world · 2 pts · 3y
Good question! And hard to answer concisely. Sometimes I consider myself an artiste, but this time I was a little more lazy in the artistic department.
I found a photo of another guitar whose tiger stripes looked good to me. I did a perspective transform on the photo to get a flat-image view of the stripes. I traced the image with a bezier curve and did quite a bit of tweaking, and I lined up the stripes against an outline shape of my guitar.
In places where a stripe would wrap around the side of the guitar, I had the stripe change angles so that it is orthogonal to the edge of the guitar, so that the stripe would stay perpendicular to the edge. I created some offset curves parallel to the guitar body profile, offset by a distance of the guitar's thickness to give me an idea of how far the stripes need to extend past the outline of the guitar to wrap around properly. I used the mirror of the image for the backside of the guitar.
I used a Cricut cutting machine (and the official Cricut software) to cut out the stripes onto an adhesive sheet. Then I put the adhesive sheet onto another adhesive sheet (something called a "transfer sheet"), to facilitate putting it onto the guitar. And I did the same thing for the back side. I then peeled off the transfer sheet and wrapped the remaining part around the sides with quite a bit of overlap for the front/back.
I originally was going to use the negative as a mask for painting (or maybe just paint the negative from the positive mask), but the original adhesive was such a great color already that I decided to just keep it as is and do a clear coat over that.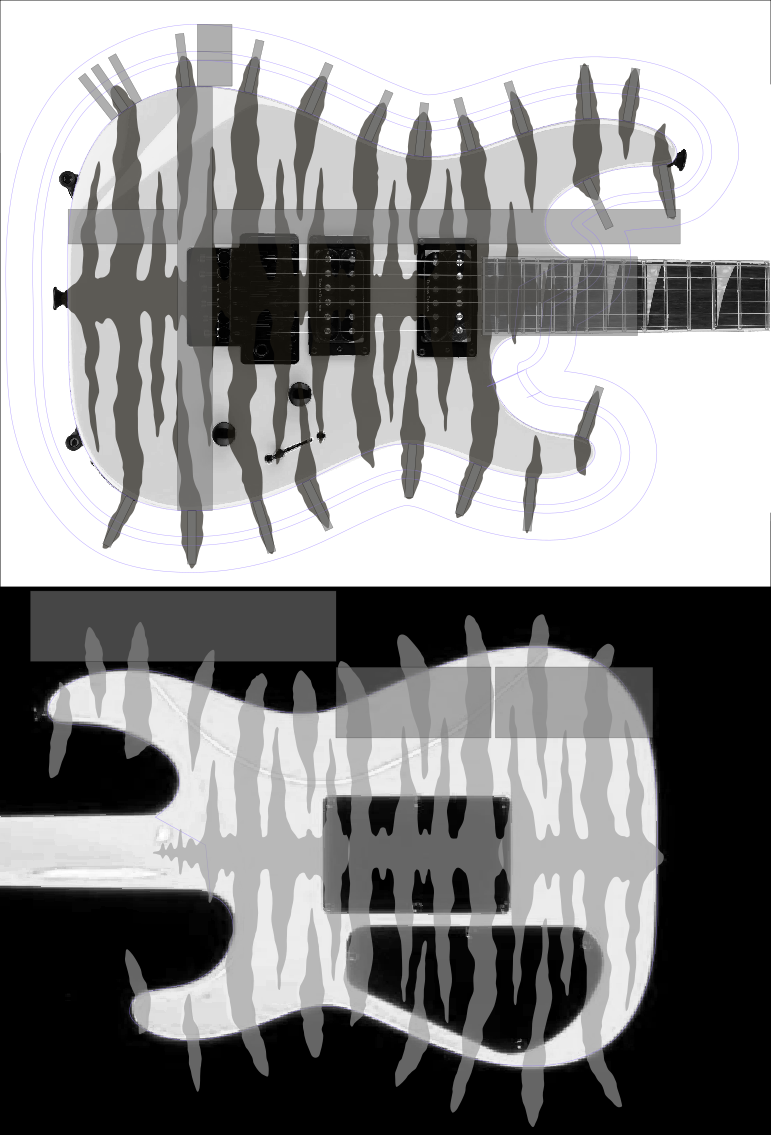
adude007@lemmy.ml · 1 pts · 3y
Looks great! No better way to get a custom than to DIY.
I’m in the process of custom painting a bass. It’s been a learning experience but just going to keep sticking with it.